Player properties
Click here for the Player Properties video tutorial.
Click here for the Player Management video tutorial.
You can customize each QL Player through a series of properties:
Screen 1
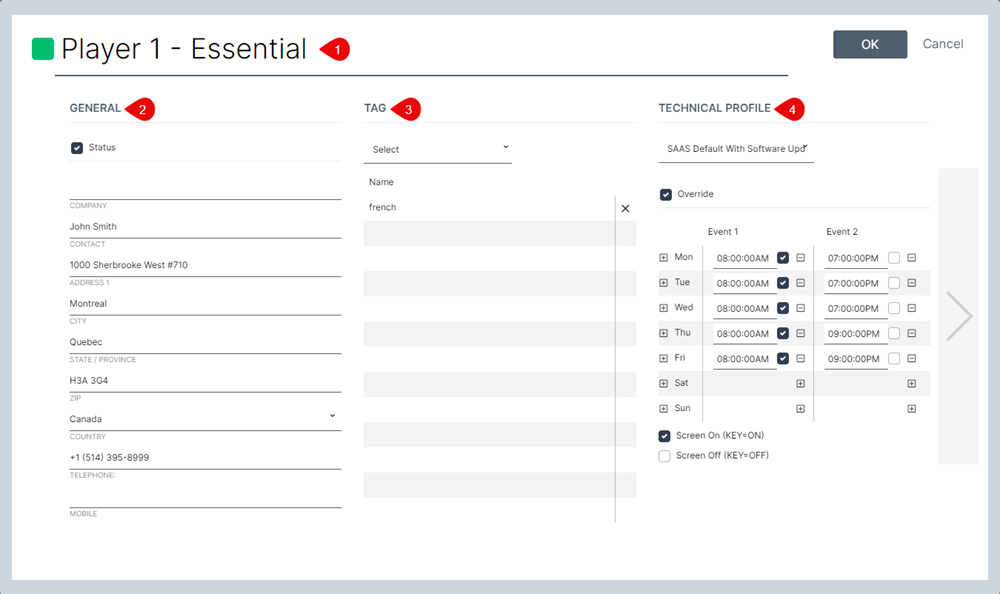
- Player name: The default player name is always Player01, Player02, etc… You can rename the player and give it a more unique and meaningful name, like Lobby Screen or Meeting Room – 2nd Floor
- General properties: Enter information about the player’s physical location. It’s also good practice to include the contact information of someone near the player’s physical location who can tend to the player.
- Player tag: Assign meta tags to determine which content can be played on this device. Content assigned matching tags will play on this player.
- Technical profile: Technical profiles contain many settings that that be assigned to one or more players. To assign a technical profile to an individual player, open its properties and then select the profile from the drop-down box. To assign a technical profile to an entire group of players, double-click the group name (or right-click and select Edit). Then, select the profile you wish to assign to all the players in the group from the Assign Profile drop-down box.

Player Technical Profiles contain a common set of parameters QL Server administrators and authorized end-users can access to manage the settings for an entire group of players.
To access the Player Technical Profile settings, click Main Menu (upper right corner) > Player Management > Technical Profile.

QL Cloud users should use the default profile (SAAS_Default) unless instructed by Navori technical support. The default profile is optimized for normal digital signage applications, but QL Cloud users can modify the parameters listed above and save customized profiles for their own players.
NOTE: Administrators and users can override any player’s programmed display on/off times by selecting the Display control override check box. This unlocks the screen event table where they can change each player’s screen on and off period. Clicking the plus (+) button and selecting the check box to the right of the time fields will add a “screen on” command. Click the minus (-) button and leave the check box empty to create a “screen off” command.
The On/Off boxes that appear under the screen event table are there as an example only. You must select the check boxes to the right of each time period to configure your screens.
If no override is created, or if the Display control override box is left unchecked, the screens will follow the on/off settings programmed in the selected player technical profile.
- Click here to find out more about QL Essential Player Technical Profiles.
- Display Control: By default, the screens are programmed to follow the on/off schedule set in the player’s Technical Profile. You can override this setting for each player by selecting the “Override” option and then selecting the on and off times for each day of the week.
Screen 2
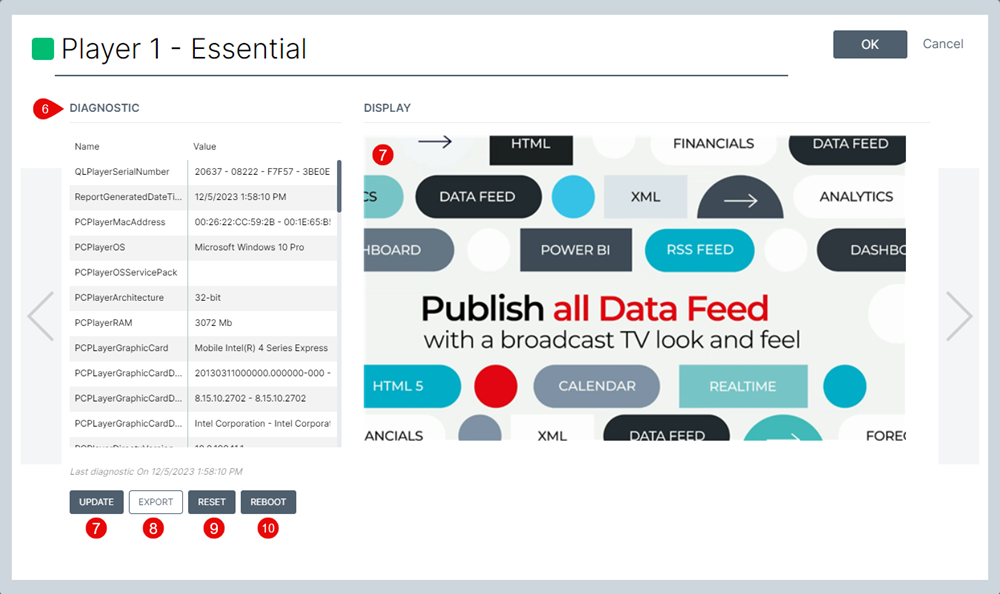
- Diagnostic: This table shows diagnostic information retrieved from the device QL Player is running on. This is a "snapshot" of the current state of the PC or other device. Refer to this information for troubleshooting or maintenance purposes. To refresh the information on this page, click the Update button (#7) below the table.
- Update: This button refreshes the data in the Diagnostic table (9) and also takes a new frame shot of the content currently being displayed on the player's screen. The image appears to the right of the Diagnostic table.
- Export: Click this button to generate and download a CSV file with the diagnostic information. TIP: Use this feature to grab technical data that you can upload with your Navori support ticket.
- Reset: The reset button is used to restore the QL Player software back to it’s “newly installed” status. All content and programming is deleted and the player will display the default media image until a new update is sent out.
- Reboot: The reboot button forces the player device to restart remotely.
Screen 3
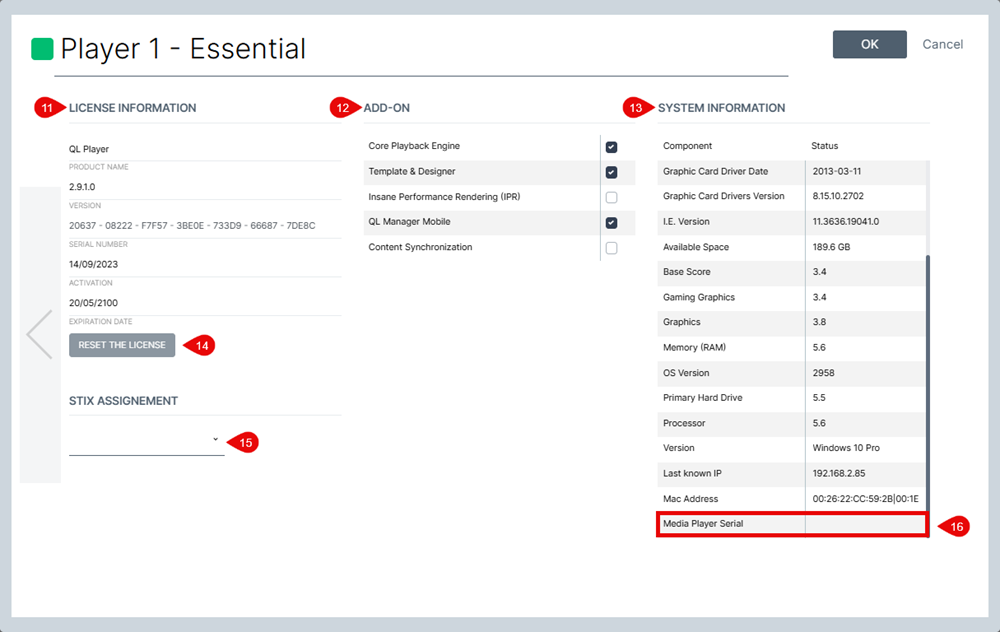
- License information: This section has only one editable field: Serial Number. The serial number is assigned by Navori through its extranet. You can only use one serial number per playback device, however, serial numbers can be transferred from one device to another as long as the software is uninstalled from the original device.
- License add-ons: the list on the right shows all available add-on modules. Modules are activated through the Navori Extranet. Each module selected in the list (checked-off) is installed and active. Unchecked boxes indicate add-ons that have not been purchased and activated. These boxes cannot be checked by the user. They simply indicate which features have been enabled.
- System information: This table reports on various technical specifications retrieved from the device QL Player is running on. The information will vary depending on the type of hardware used, operating system, etc…
- Reset the license: This button is only to be clicked in the event you wish to transfer a license from one player to another. Once clicked, the license will become “discoverable” again by a new QL Player and you will be able to activate the software on your new device using the same license number.
- STIX Assignment: This pull-down field is used to auto-activate a QL Stix 3700 media player device. For more information, please refer to the Navori Extranet.
- Media Player Serial: You can enter the media player hardware serial number in the last field. Simply click in the field and enter the alpha-numeric information for future reference. This step is optional.